
Google webmaster tools has been a key tool for website owners for years, but it has always been a little complicated to understand. Now, they have released a newer version called Google Search Console. Hands down, it is much easier to navigate and understand and it means website owners can really understand where their website is ranking, be able to submit your posts to get ranked and also see where the opportunities lie. In this post we will be going through exactly how to use google search console and throw in a few tips too.
Let’s start with how to add google search console to your website.
How to Add Google Search Console to Your Website
The first thing you will need is a google account. You will require this to be able to sign into Google Search Console and Google Analytics and as both are essential to your website and business, it is important you get set up now.
From your search engine, search for google search console and follow the link. For ease it is also here.

When you click Start Now, you will be asked to either sign in or log into a google account.

Now whilst the new Search Console is a great platform, you will still require the old version to be able to add a property. In webmaster tools or search console, your website will be referred to as ‘a property’.
In the old version, you will see a screen similar to the one below, but you will not have any properties yet.

You will want to click the red button ‘Add a Property’. Then you will want to add your website URL to the box that has appeared.
")
Make sure the box is selected as Website and you use the full URL for your website. Once you have added your new property (website).
After you have completed this step, you will need to verify that you own the property you are going to add to Google Search Console.
You will see at this point there are two tabs in your options. The recommended method is uploading a html file into your website. But that is a little more complicated, unless you know what you are doing so at this point, I would not suggest it.
If you have already set up Google Analytics, then that is the easiest way as you will just need to select it and click verify (Make sure you select you are not a robot). AS your google account already has been set up with Google Analytics, then it will be that easy.
If you haven’t already set up Google Analytics, then I suggest you do set this up first and here is a guide I created for doing just that.
If you do not want to set up Google Analytics yet, let’s explore the other ways to verify your website ownership.
The best alternative to going through Google Analytics is to add a html tag to the header of your WordPress website.
Select this option and it will display a code to add. Make sure you select all of the code, before you get ready to copy and paste it into the header of your website.
Then you can go to your WordPress editor, select appearance and editor.
From the right-hand side menu, you need to select header. The verification meta tag must be within the section of the page. Here is the guide that Google provide to help with this.
I would say at this point, I would not suggest this method and here is why. Any time that you change your website theme, or your theme has an update, it will remove this code and you will need to add it again.
You will be missing out on a lot of useful information if you do not add Google Analytics, so why not add them both at the same time. It will take you a few minutes to add Google Analytics to your website, and then another couple of minutes to add the Google Search Console.
Once you have completed these steps, you know that Google is aware of your website and you can start to use the tools and reports that Google provides you to get better results for your website.
You will also be able to switch between the old and the new version of Search Console at any time, depending on what you want to achieve, but the first thing you will want to do is submit a sitemap for your website, so Google can explore your website regularly.
How to Submit a Sitemap to Google Search Console
The new way to submit a sitemap to Google Search Console is much easier, so we will go through that method now. If you are still in the old version, press the blue button ‘Use new Search Console’.

You will see the following screen when you are in the new version. It might look a little blank at the moment, but it will look similar to this. This is the Overview report, which we will describe shortly – but back to submitting a sitemap. From the left-hand menu, select sitemaps.

IN the image, you will see that I have already submitted a sitemap. All you will want to do is add the URL of where your sitemap is. If you are using the All-in-One SEO plugin, then it will be simply sitemap.xml to the end of your website URL.
Once you have typed it in, click submit. You will then see it displayed underneath, like mine is.
In my example, it shows that I last submitted it on the 15th December, Google last read it on the 25th December. It was successful and they discovered 483 URLS or links.
Whilst you don’t need to do anything more with your sitemap after this, I do suggest that if you make a lot of changes to your posts, links or website. you come back and resubmit your sitemap using the method we just went through.
The next step that I suggest you take advantage of is the cool tool called ‘URL Inspection’.
URL Inspection – The new Fetch as Google
You can use this tool to actually request Google to search for it and add it to their search results. Any time you create a new post or edit an existing post, come back to this tool to tell Google about it. Many would still refer to this as ‘fetch as google’.
You can get to it via 2 ways. From the menu on the left, or just copy and pasting your URL to the search bar at the top.
If you inspect a URL that is already on Google, then you will see the image below:

It shows that it has already been indexed into the search results on Google. But if you have gone and added any additional content to that post, say a video, then come back and see how it says, ‘Page Changed?’ – just click request indexing.
This will take a couple of minutes to do. I have found that it doesn’t always work first time, but just try again a few minutes later.
It also tells you whether there are any issues with the coverage and AMP version, which we will cover in the report’s descriptions.
You don’t have to do this, as Google is very good at finding new content. But I found by doing this every post when I first started doing this website, it got ranked quicker and now I don’t always need to do it, as Google is keeping an eye out for it. I posted an article yesterday and didn’t submit it and yet it is already ranked in Google. I posted it at 18.29 and Google crawled the post at 20.52. Not bad, eh?
The more content you create, the more Google will want to check out your sitemap.
The Amp report is one to keep an eye out for. Most searches online are now coming from a smart phone, so Google actually searches for mobile friendly websites and potential ranks them better than non-mobile friendly websites.
For your URL, it will not be indexed yet, so you will see the image below:
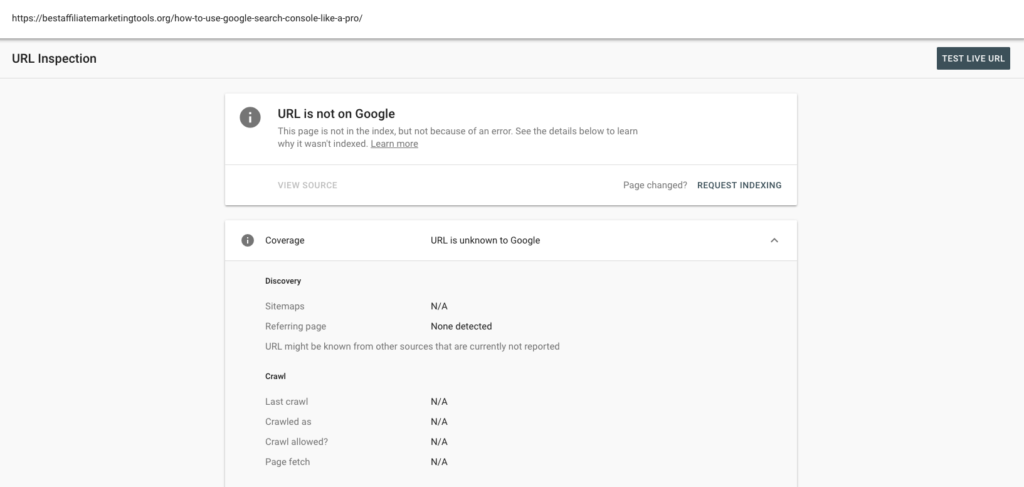
Just select, request indexing. I would do this on your main home-page, and any posts that you have already written.
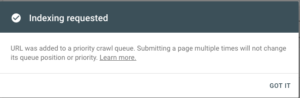
A couple of points to consider, when you submit your URL and it has been added to the index queue, do not keep doing it. It will not speed up the process, so is a waste of time. Once it has been added you will see the box below.
Overview Report
Once you have submitted your sitemap and started to get some date, your main Overview page will give you an overview of your website performance, coverage issues and enhancement information.
Performance Report
Your Performance Report gives you an insight into how you are faring with the audience out there. The pre-sets are set at last 3 months, but you can change the timeframes that the data shows you.

Total Clicks – How many clicks you have had from the search results
Total Impressions – This shows you how many times your link has been seen by someone searching for that keyword
Average CTR – the percentage click through from those impressions
Average Position – Is your average position in the search results.
The next table down displays some more specific data. You have a number of different ways of seeing the data. But if you are just starting out, I would focus on the pages tab.
Select the pages tab in the bottom table and select average position in the top table.
This will add the position column to the bottom table and mean you can see what position you are ranking for with your post.
Just click the boxes in the top table, so they are all coloured. This will display that data in the table below.
If you click the position column, it will sort high to low or low to high. Can give you an insight into your rankings.
When your website is relatively new, you aren’t really getting the traffic to accurately decipher the information but it is a good to know where you are ranking, as the higher you rank for a keyword the better your chances of getting traffic.
Coverage Report
The coverage report tells you if you have issues with your website. But I wouldn’t worry too much about some of the errors that come up. If you select a URL to not be indexed by Google (your privacy policy for example), then it will show as an error. But you know that.
You will also see that some affiliate links will appear in the excluded section, again you will see I have a high number, but as this is by link and not post it does seem high. But it isn’t really a problem. So, I do take the coverage page with a pinch of salt to a degree.
If you do see errors, you can see the detail in the bottom table and follow the correct action depending on what the error is.

Error – Pages that couldn’t be indexed
Valid with Warnings – Is a valid page, but it has issues you need to deal with
Valid – Pages that have been indexed
Excluded – These pages were intentionally not indexed.
Mobile Usability Report
The mobile usability report is useful to understand how mobile friendly your website is, it will also detail any errors that you need to resolve to avoid anyone getting to your site and finding a problem.
Error – This is a critical error in the structured data
Valid – Have no errors.
AMP Report
Get to see if there are any AMP errors within your website. Amp was launched as a way of having a condensed mobile friendly version of your website running for ease of use. If you are running an AMP plugin, then this report will let you know if you have any issues to fix.

Error – This is a critical error in the structured data
Valid with Warnings – Are valid, but are missing some data
Valid – have no errors.
Links Report
Who is linking to your website, which pages are linking to each other? At the end of the day, Google loves you linking to other pages or posts on your website. My homepage shows links of 609, yet there are no even than many pages on my website. Internal and external links are important, and you can get an insight into the information on this tab.
Conclusion – Google Search Console
Getting ranked onto the first page of Google is where any aspiring website owner wants to be. They hold the most users and getting to rank number one is the pinnacle and often the trigger for getting a load of traffic.
But if you do not use google search console or google analytics, how do you know how you are ranking or even tell google about your website.
Submit your sitemap to Google, use the URL inspection to get your posts ranked quicker. Check out any errors and see whether they require you to do something about it and watch your rankings.
You can also identify some keyword opportunities within the search results. You will soon notice that you are ranking for keywords that you were not targeting and so it could be an chance to explore that keyword in detail with a post.
If you are relatively new, I wouldn’t also advise that you do not spend a lot of time on it… I say the same for Analytics.
Until you are getting a real chunk of traffic, then the data can be misleading, and you end up wasting your time reviewing it. As a new website owner, your focus should be on creating content. Once you are getting thousands of visits to your website, then it is worth checking it out regularly. Otherwise, use the URL inspection toll every time you create a post and then leave and work on the next post.
Check it monthly, like you should with Analytics and hopefully you will see an upward trend.
Hopefully now you have a grasp of how to use Google Search Console.
If you still have any questions, then please write them in the comments below and I will get back to you as soon as I can. John